


From time to time, there are words or phrases that I hear repeated enough to the point where I eventually think, “Hmm, I should check this out.” Render was one of those words.
On Twitter, I have seen various conversations where people want to migrate from Heroku to another service. Some of the issues people have raised include:
- Cost
- Lack of options for persistent storage
- Not ideal for hosting static sites
- A slowdown in recent product development
In some of those conversations, I have seen the question pop up, “What about Render?”
So, what about Render? How hard is it to make the move from Heroku to Render? I wanted to find out. I started with a simple web application that I had deployed to Heroku, and I went through the process of migrating it to Render. All in all, it took me about 10 minutes. In this post, I’m going to walk through the steps that I took.
All you need to get started is a GitHub account.
A brief overview of my Node.js application
Currently I have a simple Node.js application running on Heroku. I also have Heroku Postgres and Heroku Redis installed as add-ons for this application.
The app is simple. When I send a GET request to /countries, I get a response body that 1) tells me the source of the data (database or cache) and 2) gives me a listing of countries.
There is also an endpoint (/clear_cache) that I can hit with a POST request to clear the Redis cache.
Step 1: Setting up our application in Render
First, go to render.com and either log in or sign up with GitHub. Once you’re logged in, click on the New button in the top bar next to your Account Avatar. Then, choose Web Service.
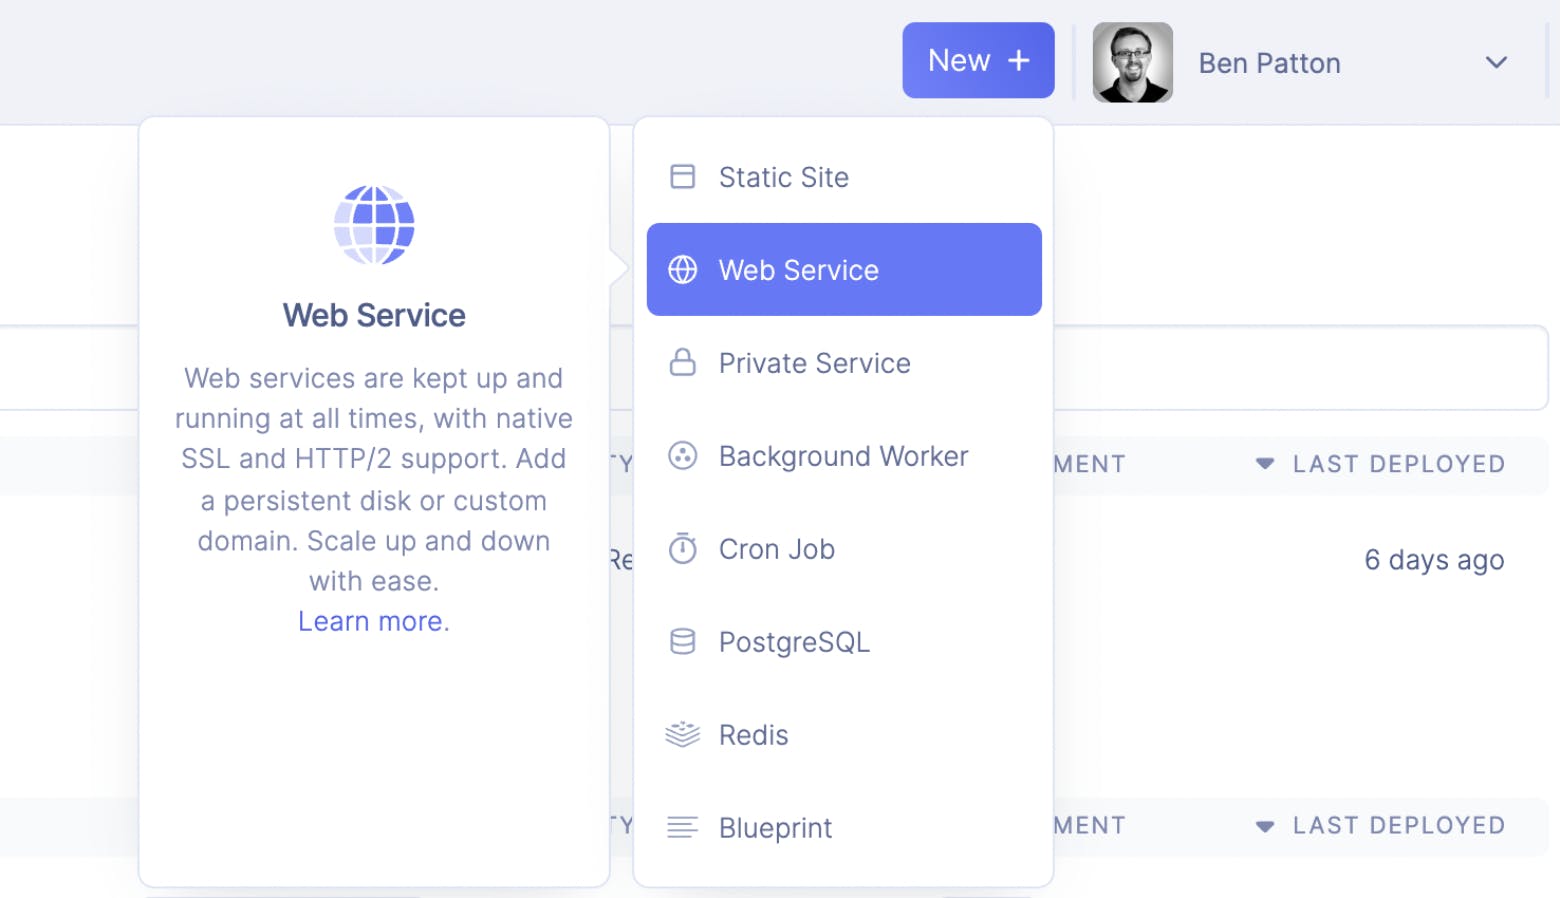
Next, select the GitHub repository that you want to deploy. Provide a name for your application and give it the appropriate startup commands. For this demo—since this is a Node.js project—my application is set to run npm install and npm start.
Choose the free plan here, too. For now, this is sufficient for our demo needs. You can always upgrade your plan as your app scales up.
Step 2: Setting up Postgres on Render
Setting up Postgres on Render is simple. Again, in the top menu bar, all you have to do is click on New and then PostgreSQL.
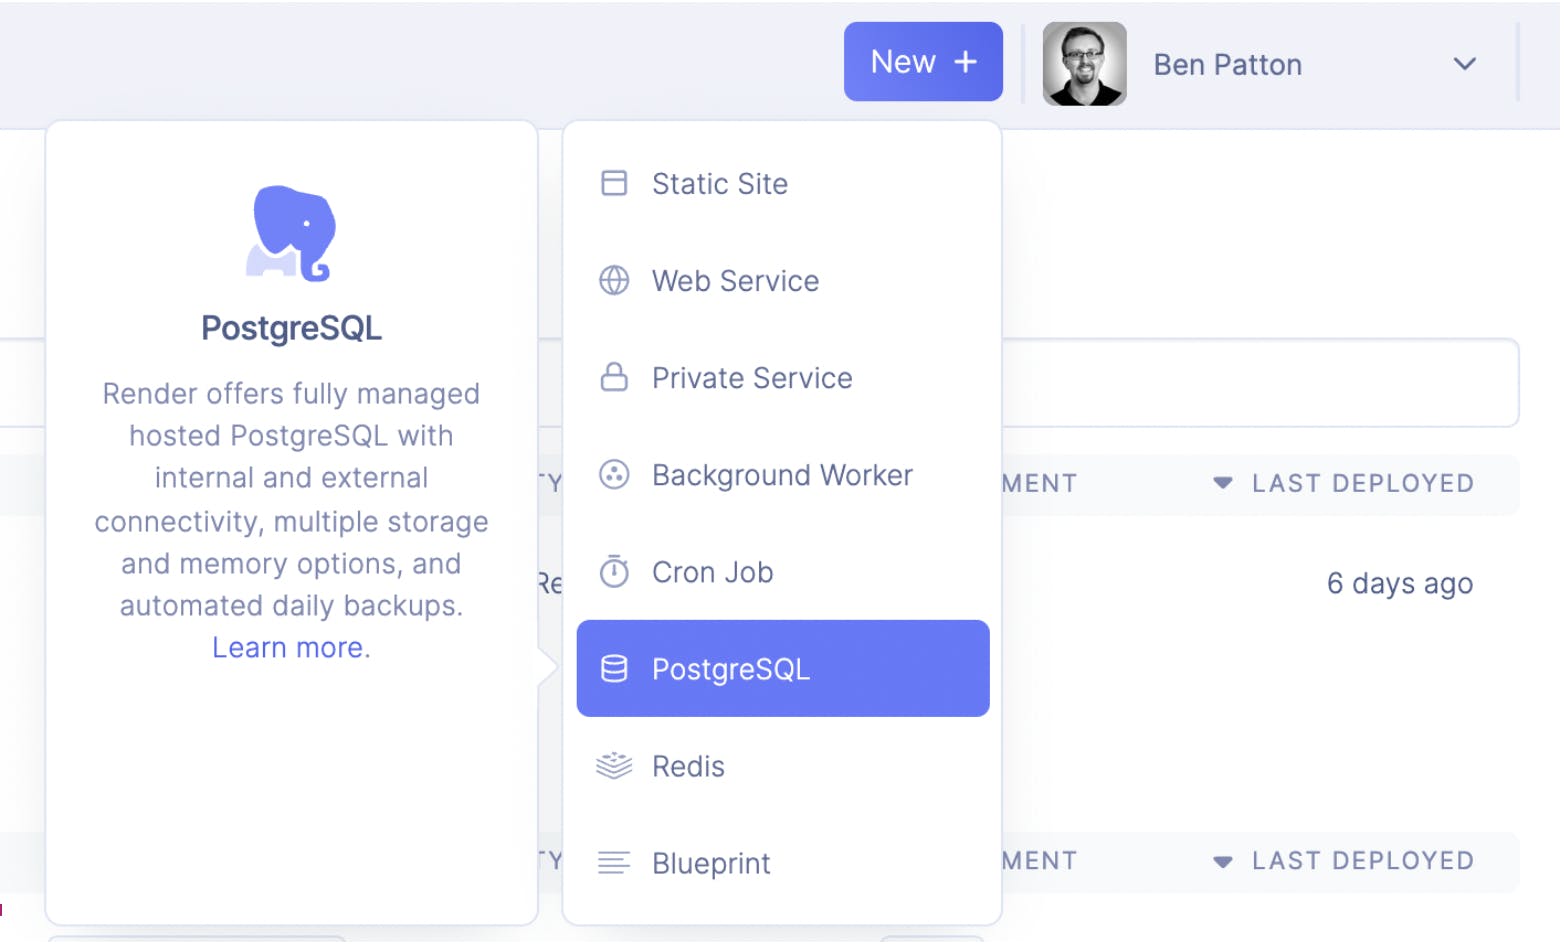
Next, provide a name for your Postgres database. For this demo, I kept the remaining defaults, and I went with the free plan.
Then, click on Create Database.
You’ll see a Configuring Environment Variables step below, but we’ll come back to that in a little bit. For now, we’ll move on to setting up Redis.
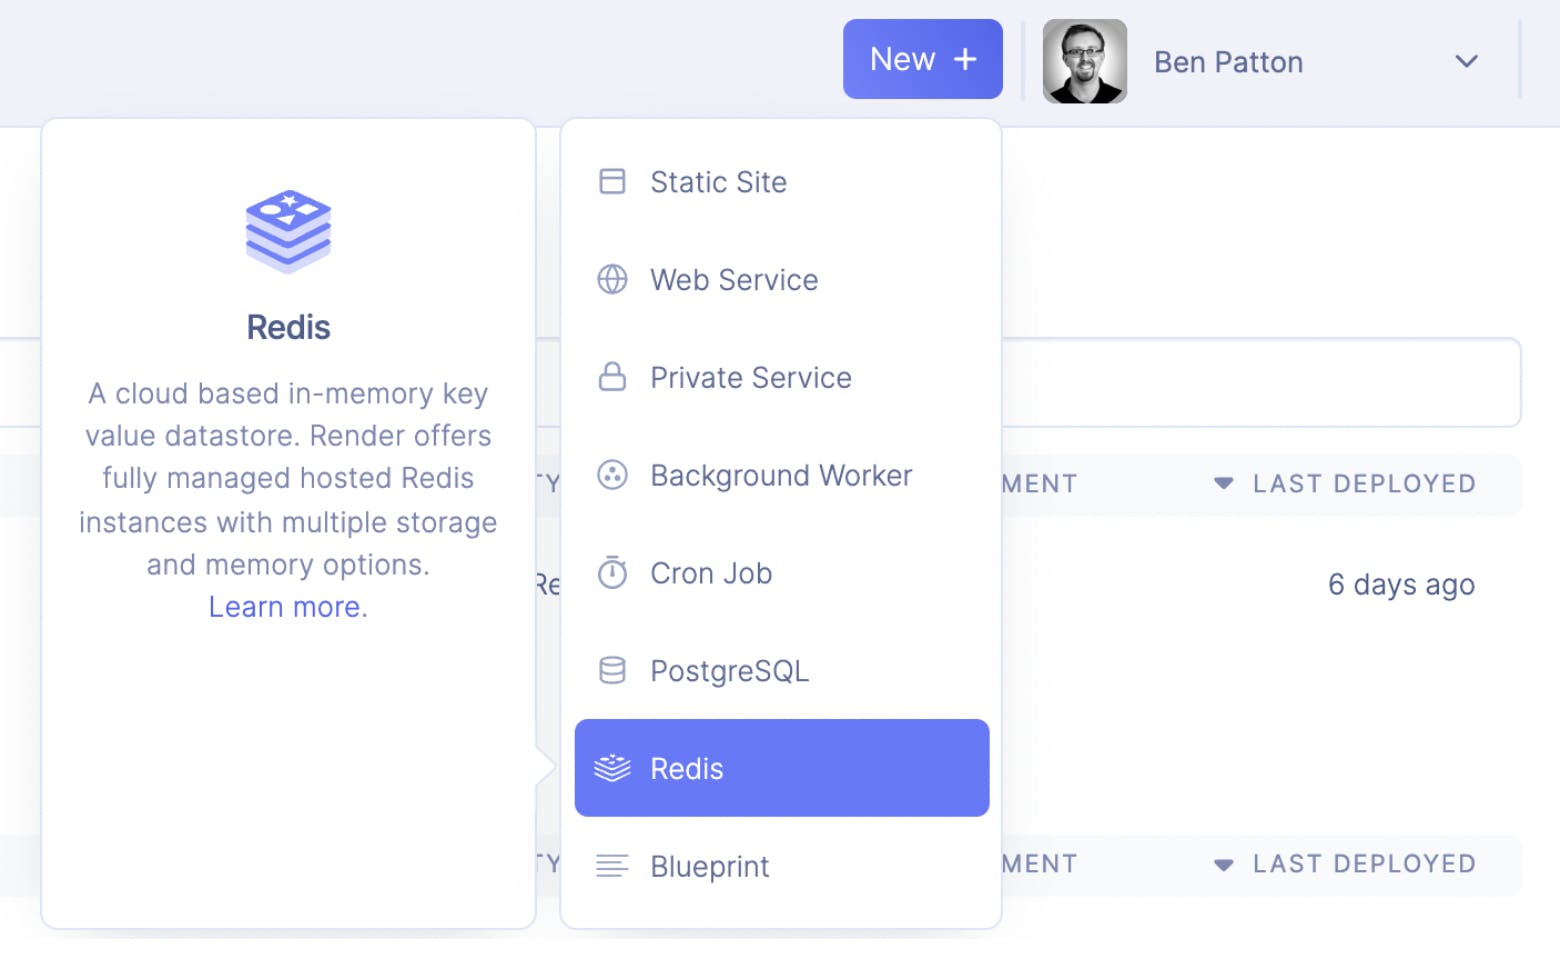
Step 3: Setting up Redis on Render
Redis is a fast and flexible key-value store that we’ll use for caching in our demo app. Constantly querying a database can get expensive, especially as your application scales. When subsequent queries return the same result, it makes sense to cache those results to prevent unnecessary hits to the database. Redis lets us do this.
Until recently, Render didn’t offer a managed Redis service. You had to host Redis yourself somewhere else. But good news! After several months of early access availability only, Render recently released its managed Redis service, which includes a free tier!
So, just like before, click on New and select Redis from the dropdown. Be sure to name your Redis instance, choose the free plan, and then click on Create Redis.
Now that Redis and Postgres are both set up, we can move on to setting up our environment variables.
Step 4: Configuring environment variables
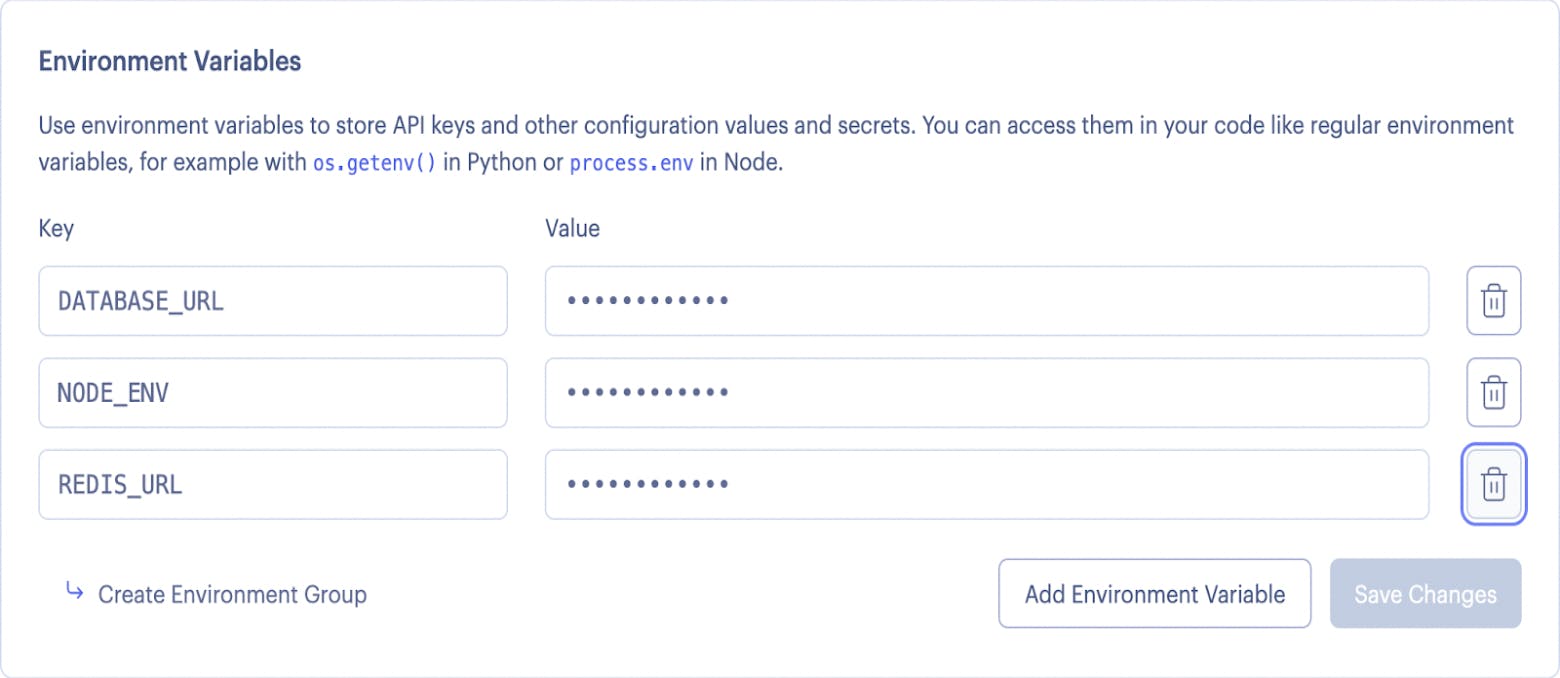
Our web application relies on certain environment variables. In particular, we wanted the flexibility to specify our Postgres database location and Redis location on the fly rather than hardwire those locations into the code. Let’s walk through how to specify those environment variables in Render.
Go to your Dashboard and click on the Web Service you created in step one.
Click on Environment in the sub-navigation menu on the page.
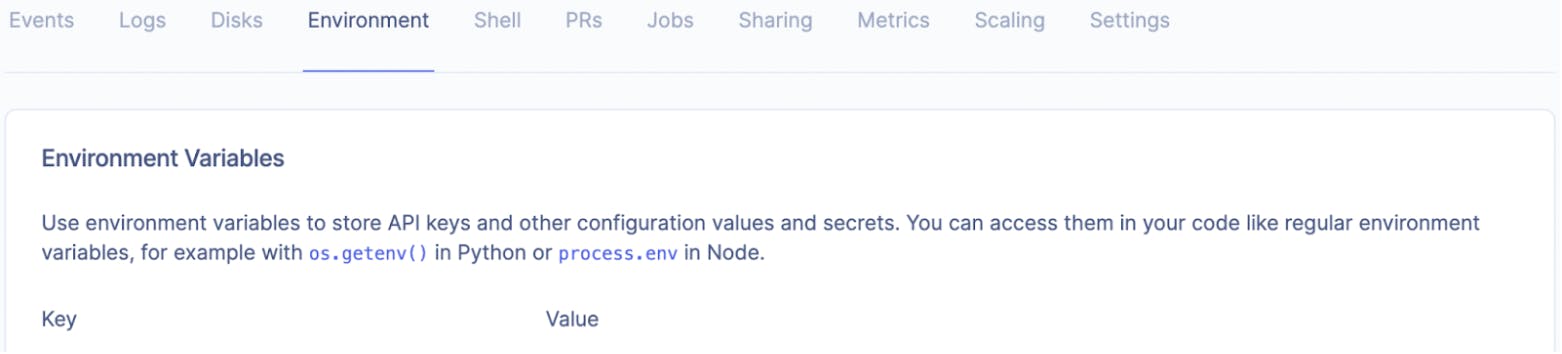
Now, you can either select to create individual environment variables that are attached to the web service, or you can create an Environment Group and attach it to your web service. Either approach could work fine for our application.
We need to create three environment variables:
DATABASE_URL: Set this to the Internal Connection String value from the configuration page for the Postgres instance you set up in Step 2.
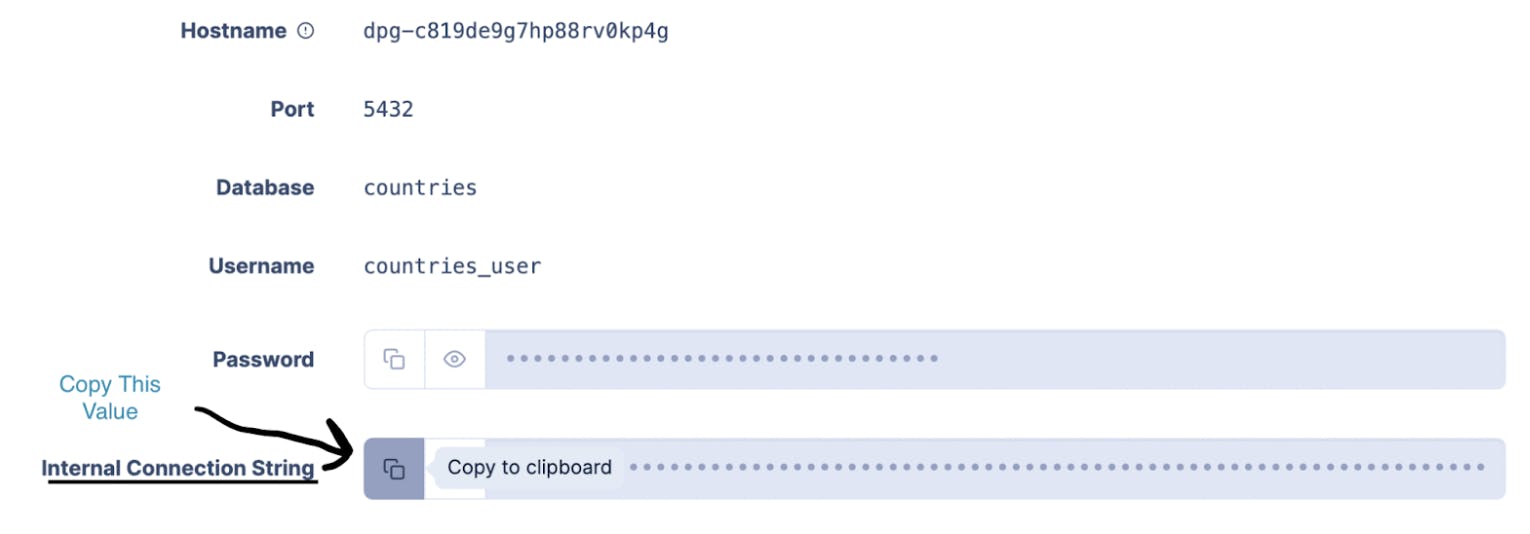
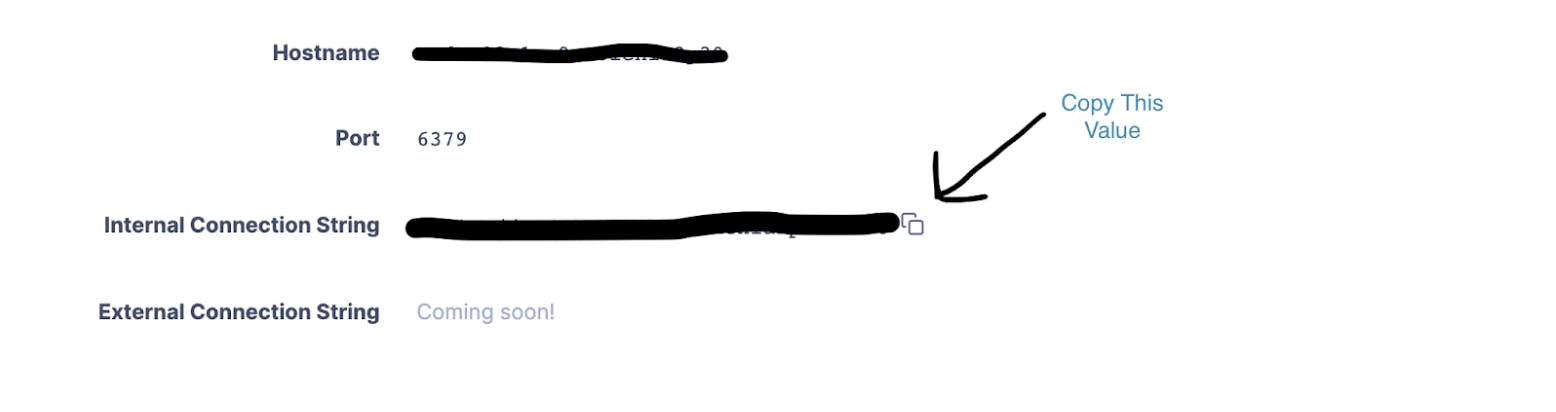
REDIS_URL: Set this to the Internal Connection String value from the configuration page for the Redis instance you set up in Step 3.
NODE_ENV: Set this toproduction. The environment variables for your Web Service should look similar to the following:
Testing Our App
With our environment variables set, we can test our app. I used curl commands to send requests to my Render application.
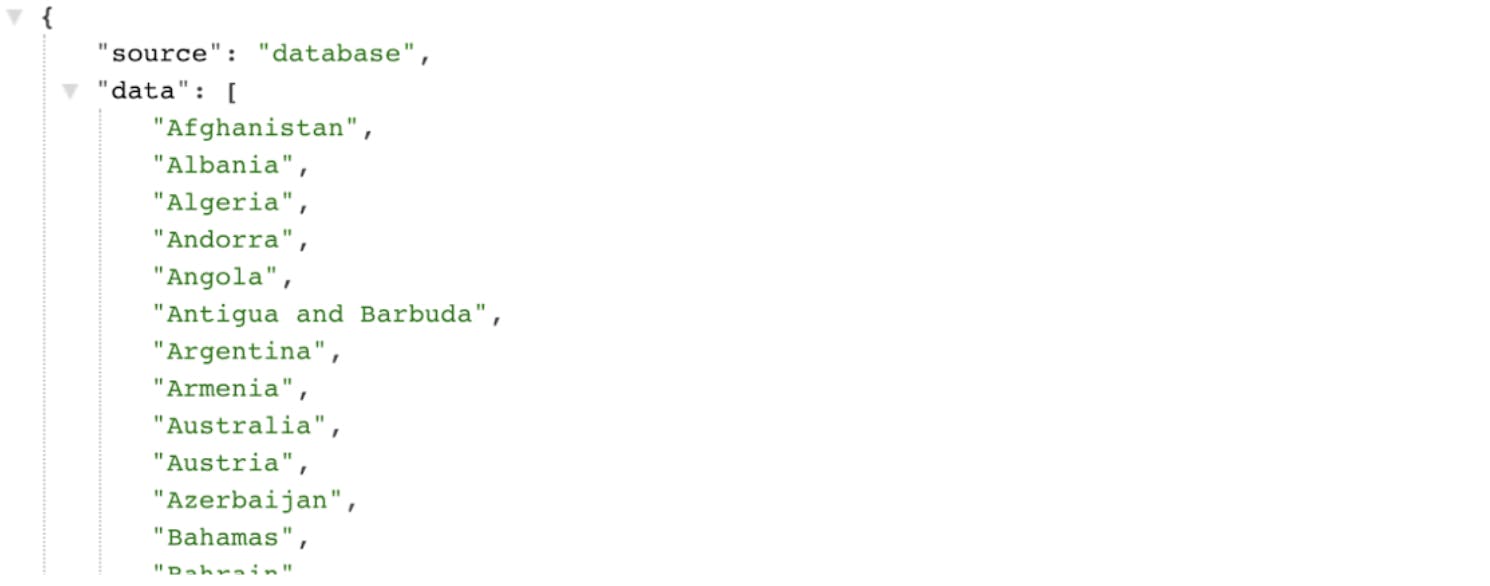
First, we send a GET request to https://redis-postgres-demo.onrender.com/countries. In my terminal window, the command looks like this:
curl -X GET https://redis-postgres-demo.onrender.com/countries
Here’s the response I received:
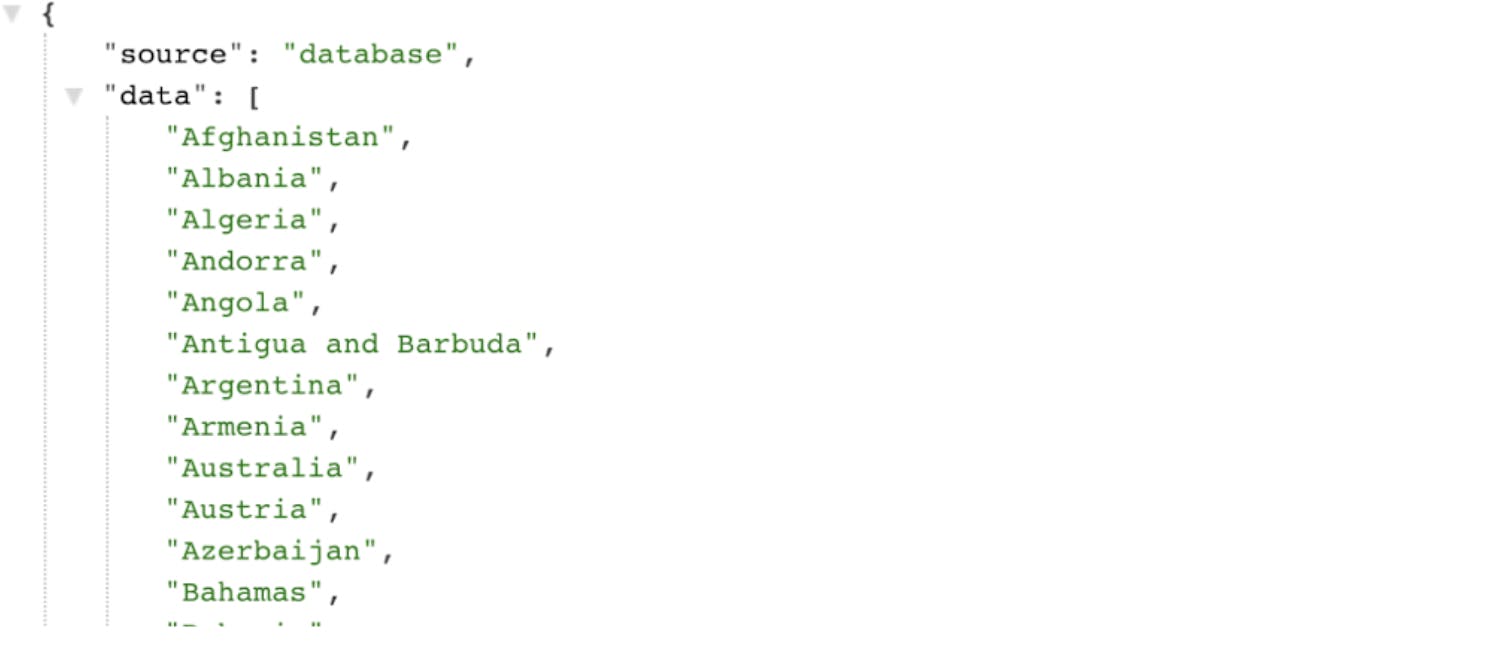
The source describes where we are getting data from, and data is simply all of the countries. We can see from the above response that—for this first request—the source of the data is the database.
Next, we send a second GET request to the same endpoint. The response is as follows:
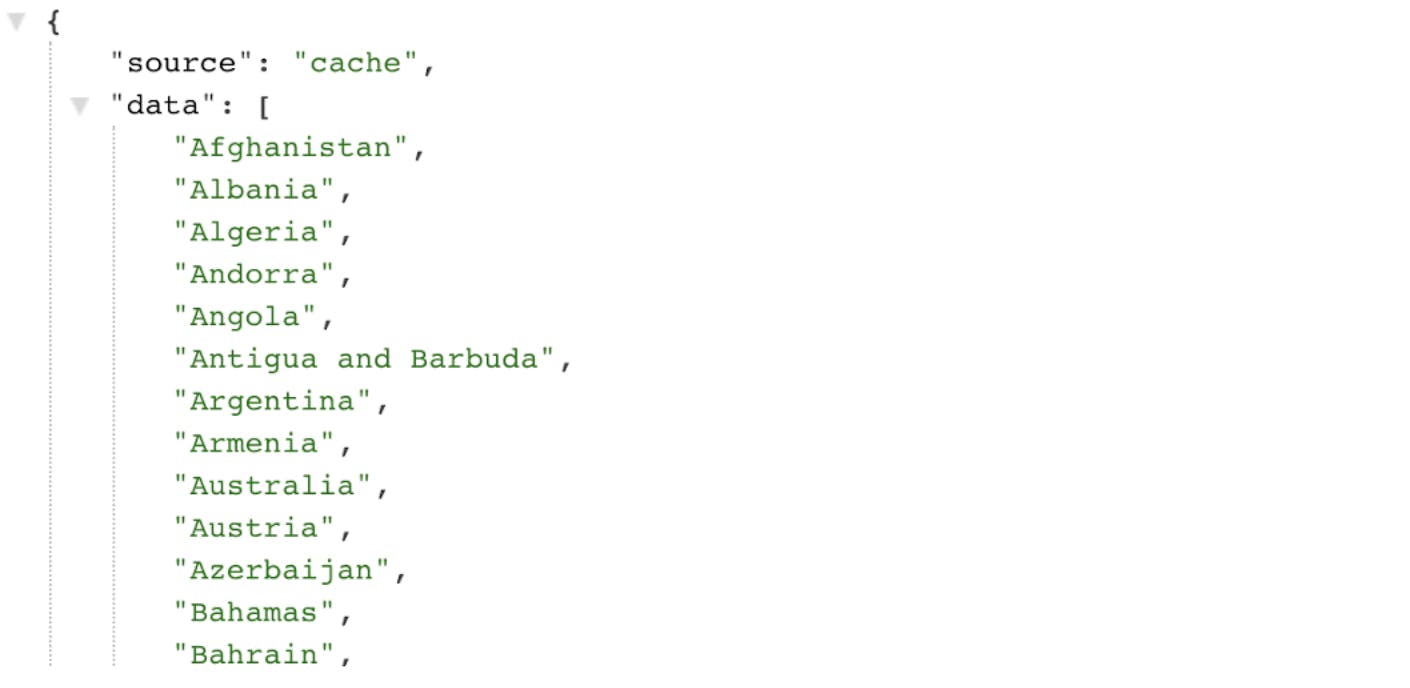
As expected, the source of the data for this second request is the Redis cache and not the database.
Next, we send a POST request to clear the cache:
curl -X POST https://redis-postgres-demo.onrender.com/clear_cache
After clearing the cache, we send another GET request to retrieve our list of countries. As expected, since there is no cache to draw from, the source for the data returned is the database.
And with that, our little app has been seamlessly migrated to Render. Render makes setting up Postgres and Redis a breeze!
Conclusion
In summary, we had an app running on Heroku that used Postgres and Redis. By simply connecting our GitHub account to Render, we were able to use Render to:
- Deploy our Web Service
- Set up Postgres and Redis
- Set up environment variables to point our Web Service to our Postgres database and Redis instance.
We did all this with a few clicks, in about the time it takes to brew a pot of coffee.
So, let’s go back to the original question. If you’re looking to migrate away from Heroku, you might be asking, “What about Render?” I’d say it’s definitely worth considering.
Here is a video that walks through my entire process: youtu.be/dambnfHv6fU